Before you start
This guide walks the whole job end to end: from opening Screenshot Bro for the first time to a finished set of App Store and Google Play screenshots, in every language you ship, uploaded to the store. It takes about twenty minutes the first time and a good deal less after that.
What you need
- Screenshot Bro, on a Mac running macOS 15 or later, or an iPad or iPhone running iOS/iPadOS 18 or later. The free tier is enough to follow every step here.
- A handful of raw screenshots of your app — from the Simulator, from a real device, it doesn't matter. Three to five is plenty to start.
- A rough idea of what each screenshot should say. One short line per screenshot. You can write them as you go, but it's faster if you don't have to.
Every step links to the matching section of the help docs, which go deeper on any control mentioned here.
Prefer to watch first? This video covers the first two steps.
How to Create Your First Project in Screenshot Bro
Get started with Screenshot Bro: name your project, choose a layout, set screen sizes for iPhone, iPad, and Android, and swap templates at any time.
01 Install and open Screenshot Bro
Get the app, open it, and get your bearings in the editor.
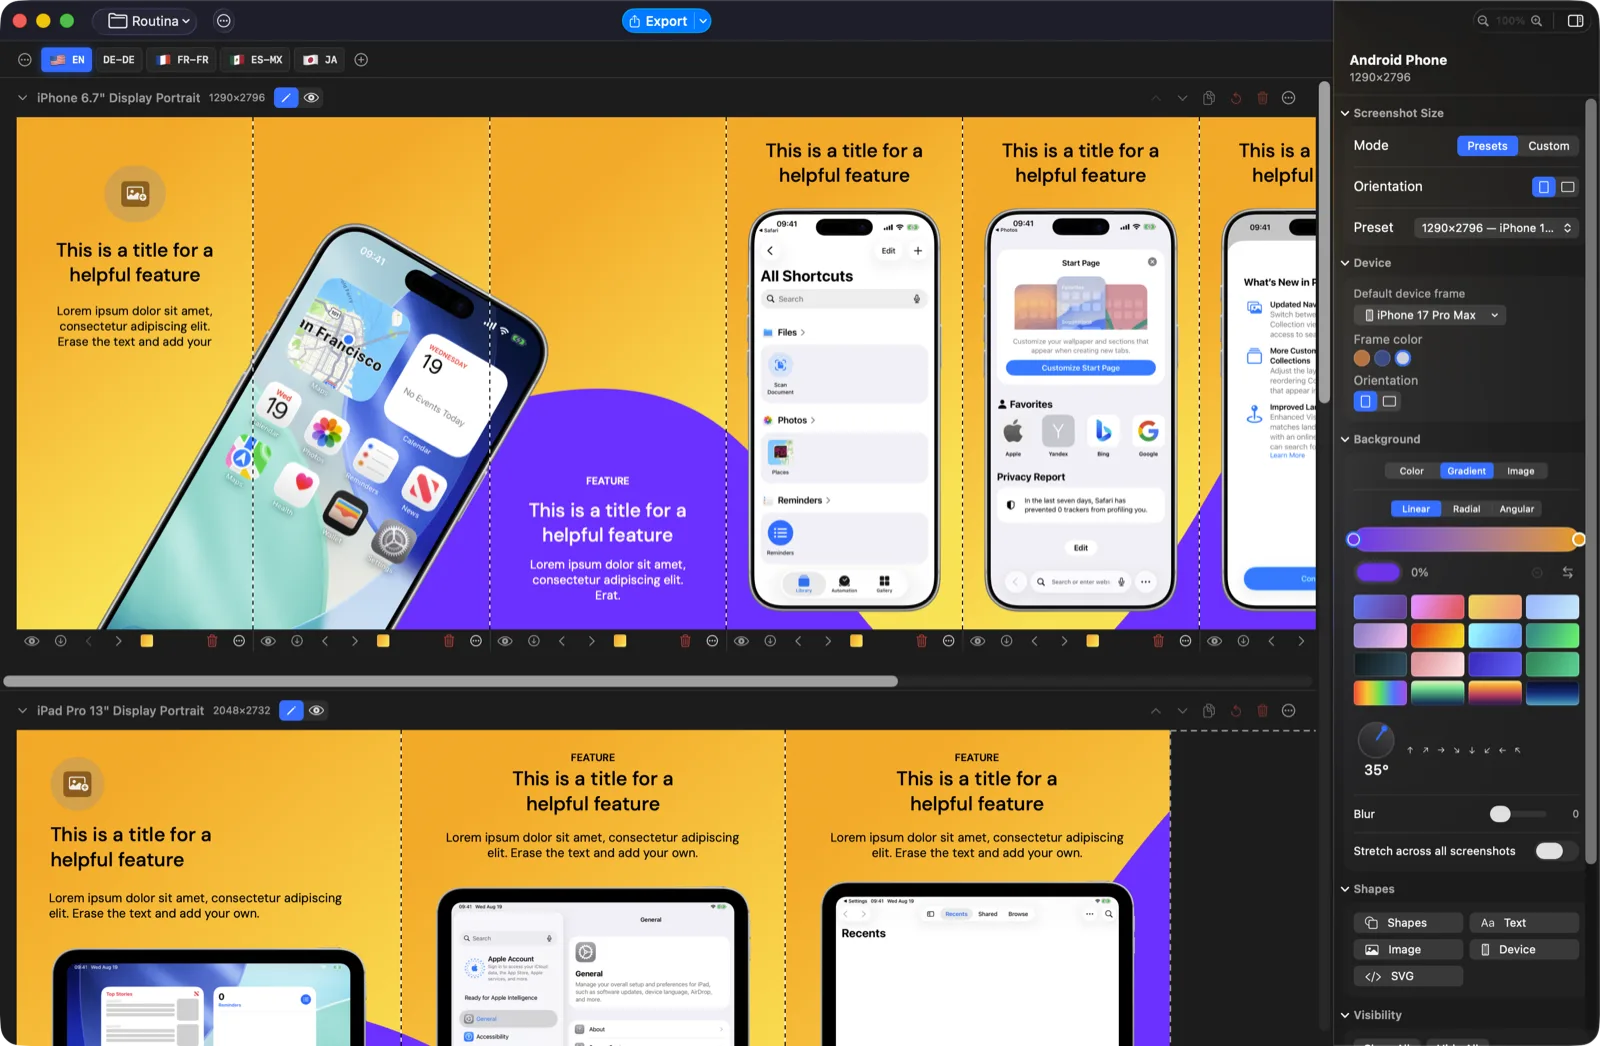
Screenshot Bro is a native app, not a website — it runs on macOS 15 and later, and on iPad and iPhone running iOS/iPadOS 18 and later. There is no signup and no trial clock. The free tier gives you one project with up to 3 rows and 5 screenshots per row, every device frame, every language, and exports with no watermark.
The first time a project opens, a short coach tour points out five things in order: where to drop a screenshot, the row editor, the language menu, the export button, and what Pro unlocks. It maps almost exactly onto the steps below.
What you're looking at
- The canvas fills most of the window. It is one continuous, zoomable surface — every device size and every screenshot in your listing sits on it side by side, rather than in separate documents.
- Rows are the horizontal bands on the canvas. One row per device size.
- The inspector on the right holds the settings for whatever is selected — a whole row, or a single shape.
- The toolbar has the project switcher on the left, Export in the middle, and zoom, undo, the inspector toggle and the language menu on the right.
⌘⌥I hides the inspector when you want the canvas to yourself, and ⌘0 snaps the zoom back to its default.
Full reference: Welcome & workflow
02 Create your first project
One project holds one app's entire screenshot set. Start from a template, or from blank.
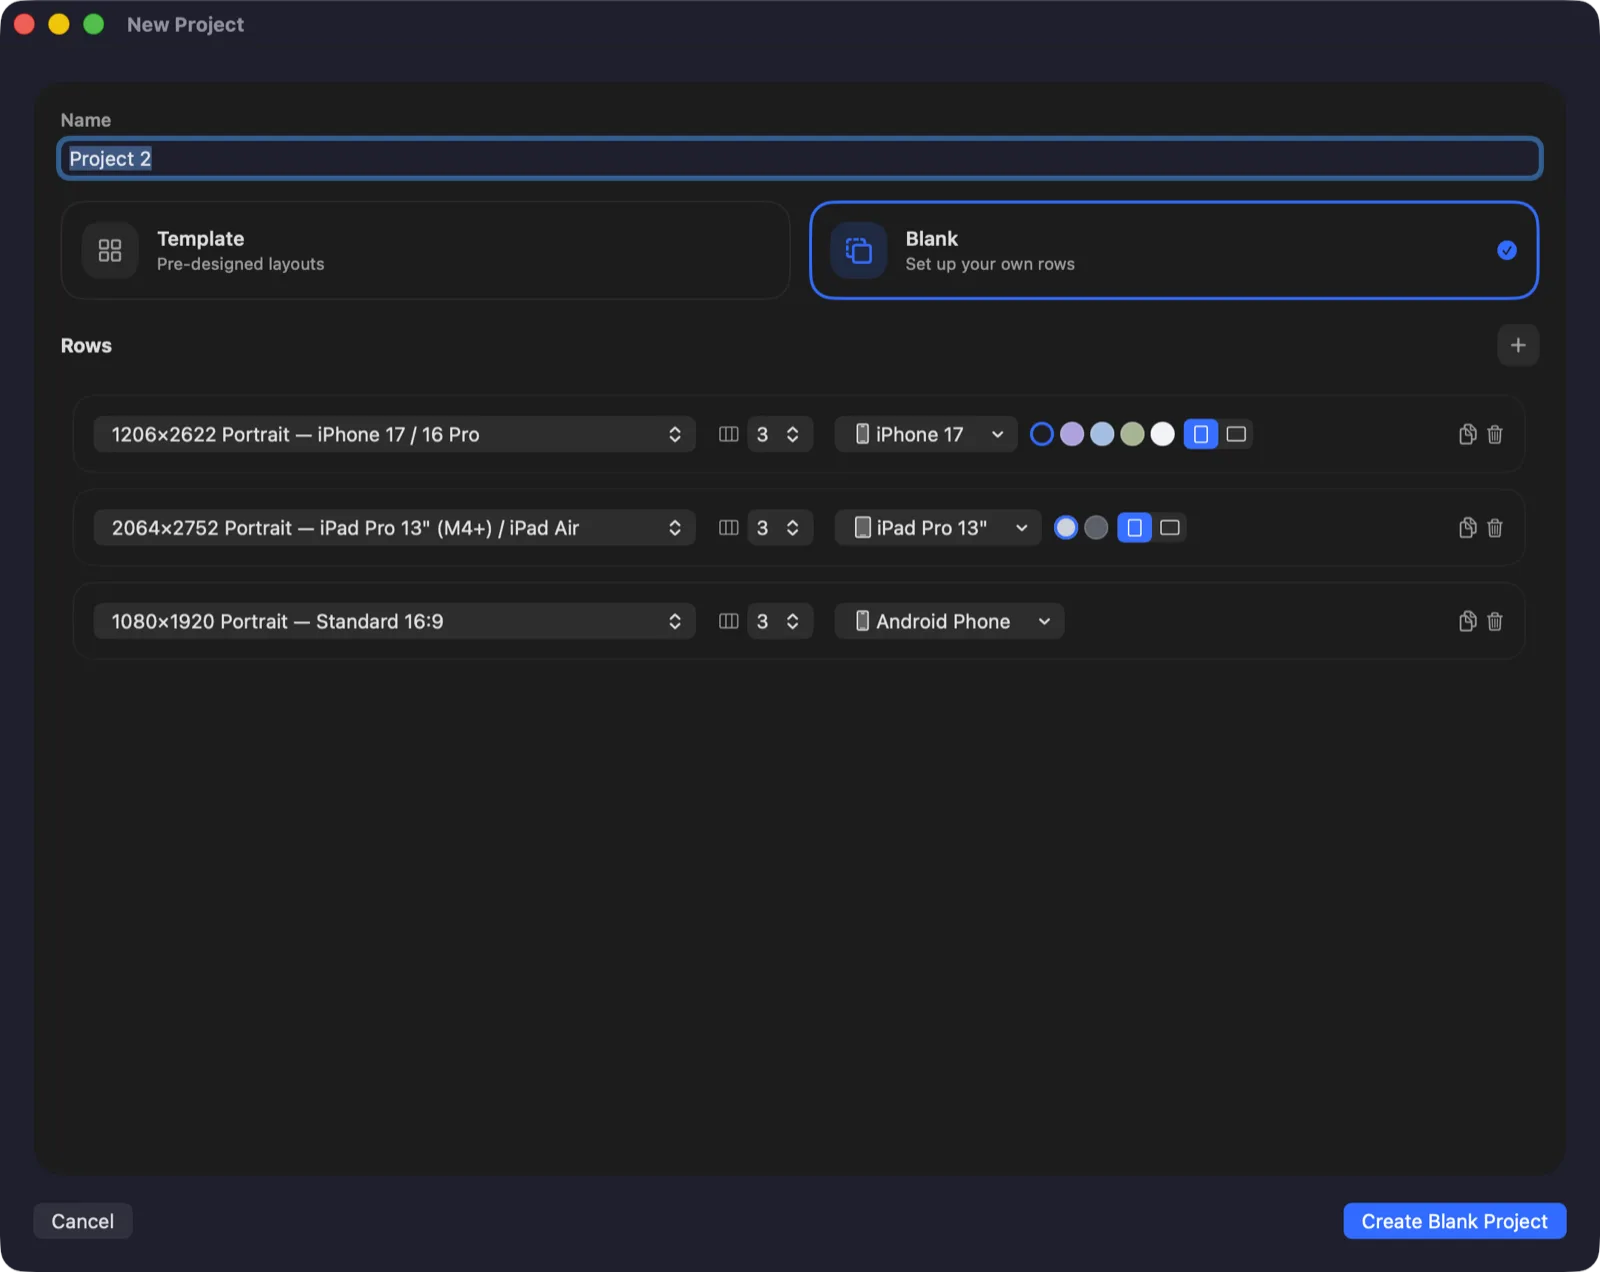
File ▸ New Project… (⌘N) opens the New Project window. Name it after your app, or after the app plus the release it's for — a project is normally one app, or one major version of one app.
Template or blank
- Template starts you on one of the 50+ bundled layouts; the button then reads Create from Template. Pick this if you want something that already looks finished — the copy, screenshots and colours are all yours to change afterwards.
- Blank gives you an empty canvas and the button reads Create Blank Project. Pick this if you already know the layout you want, or you're rebuilding an existing listing.
Set the rows up front
- The Rows list in the window configures the project before it opens: a screenshot size, how many screenshots, and a device frame for each row.
- Nothing here is locked in — every one of those can be changed later from the inspector.
There is no Save command to forget: projects autosave 0.3 seconds after your last change. For a one-off copy, use Settings ▸ General ▸ Storage ▸ Create Backup….
Full reference: Projects
03 Set up rows and screenshots
A row for each device size, and a column for each screenshot you'll submit.
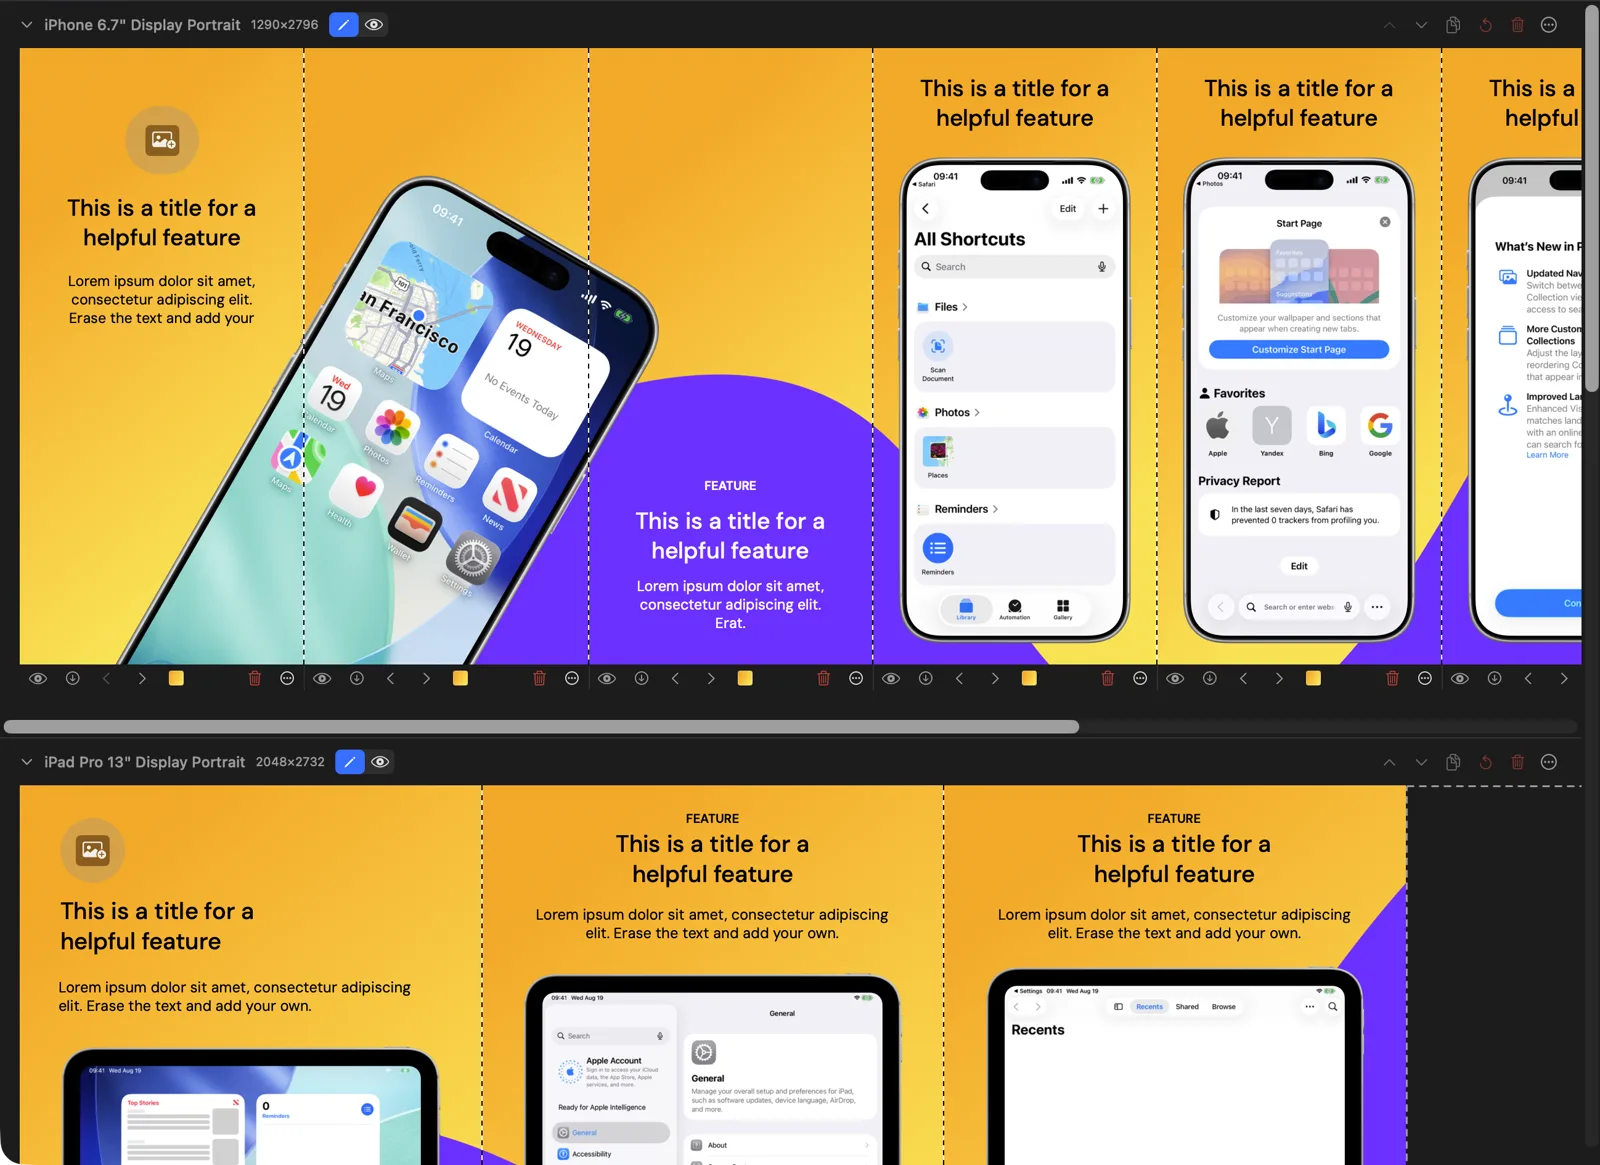
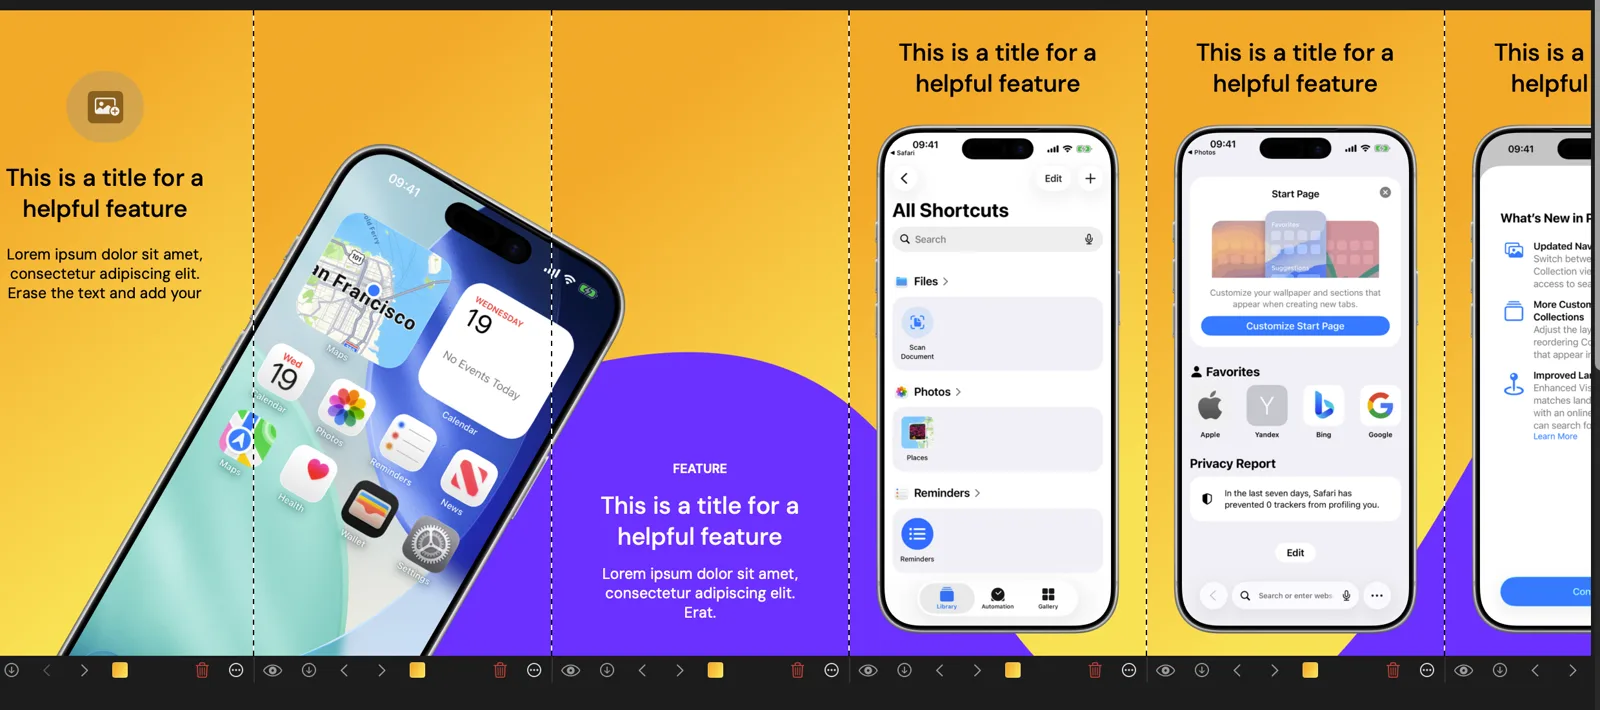
Two words carry most of the weight in Screenshot Bro:
- A row is one device size. The App Store wants separate uploads for iPhone and iPad, so those are two rows.
- A screenshot is one column inside a row — one final image you submit. The App Store accepts up to 10 per size and Google Play up to 8; most apps use somewhere between three and ten.
Adding a row
- The dashed + tile at the bottom of the canvas adds one — its tooltip reads "Add new row".
- With the row selected, the inspector's Screenshot Size section sets its pixel size. Presets covers the sizes the stores accept —
iPhone 6.9"at 1290×2796,iPad 13"at 2048×2732,Mac Desktopat 2880×1800,Android Phoneat 1080×1920, and so on — or switch to Custom and type your own. - Exports come out at exactly these dimensions, so this is the setting that decides whether the store accepts your upload.
Adding screenshots to a row
- The dashed + at the right-hand end of a row adds a column — its tooltip reads "Add screenshot".
- Drag columns left and right to reorder them. That order becomes the export numbering, and the order shoppers swipe through in the store.
- The ⋯ menu in the row header has Duplicate Row, Move Row Up / Down, and export for that row on its own.
Not sure which sizes to start with? Design the largest first — a 6.9" iPhone row, plus a 13" iPad row if your app runs on iPad — then adapt downwards. App Store screenshot sizes has the full table.
04 Drop in your raw screenshots
Drag captures from the Simulator or a real device straight onto the canvas.
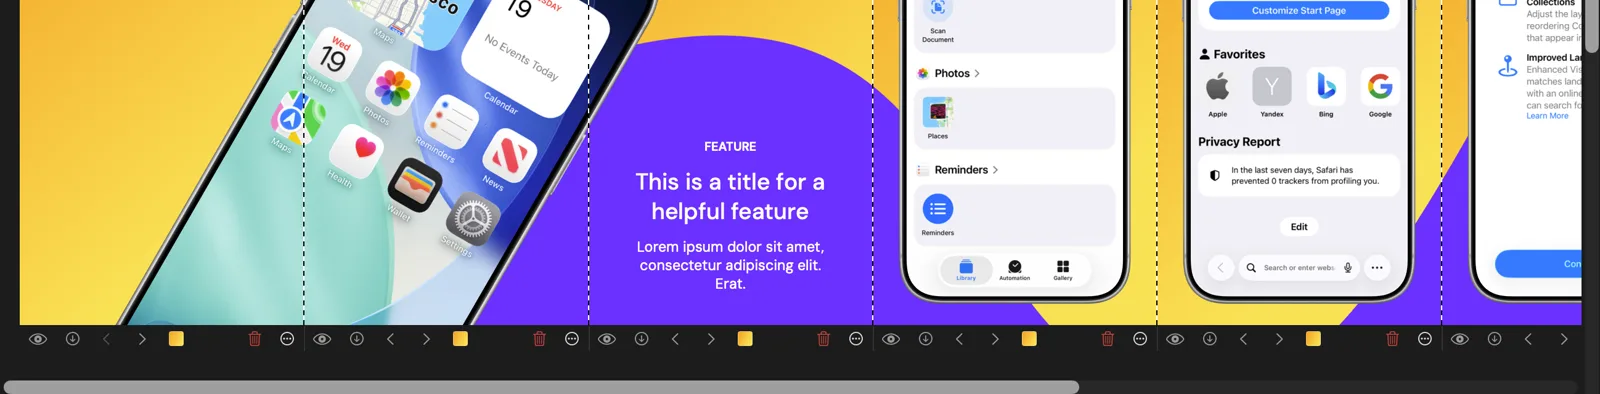
Capture your raw screenshots first — Simulator, a real device, whatever you already have — then drag them in.
- Drop one file onto one screenshot to attach it. If that column has no device frame yet, one is created for you.
- Drop a group of files onto a row and they fill the columns in order, adding columns if the row runs out.
- Screenshot Bro reads the pixel dimensions of what you dropped and picks a matching device category and model where it can.
Other things worth dropping in
- Background images — PNG, JPEG or SVG — onto the image well in the inspector's Background section.
- Custom fonts: choose Pick custom font in any text shape's font picker to import
.otf/.ttffiles. Imported fonts are bundled with the project, so they survive iCloud sync and backups. - SVG markup, pasted into the dialog behind the inspector's SVG button. It is sanitised — scripts and event handlers are stripped — before it renders.
Select the whole batch in Finder and drop it on the row in one go. File order becomes screenshot order, which saves reordering later.
Full reference: Importing
05 Frame them in a device
Wrap each screenshot in an accurate device bezel — or in none at all.
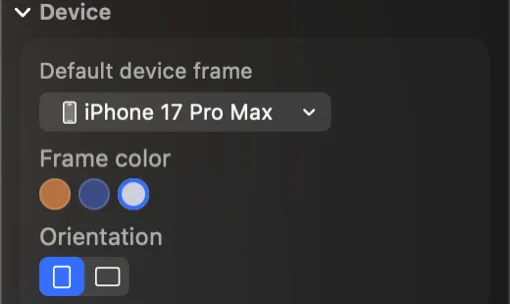
A device shape draws your screenshot inside a real bezel with the correct screen inset. Select one and the properties bar along the bottom of the window lets you change its model, colour and orientation.
What's available
- iPhone — iPhone 17, iPhone Air, iPhone 17 Pro and iPhone 17 Pro Max, in the current colours.
- iPad Pro 11" and iPad Pro 13", portrait and landscape.
- Mac — MacBook Air 13", MacBook Pro 14" and 16", and iMac 24".
- Watch — Apple Watch Ultra 3, with its band variants.
- Android Phone, Abstract Pixel 9 and Android Tablet — abstract frames that flex to match whatever aspect ratio you drop into them.
- Invisible — no bezel at all, just the screenshot. Use it when you want the image to bleed off the edge of the canvas.
Changing frames you've already placed
- The inspector's Device section sets the row's Default device frame, its colour and its orientation, so new screenshots in that row all start the same way.
- Row menu ▸ Devices ▸ Change All To swaps every frame in the row to another model in one step.
- Right-click a device ▸ Match Size to Other Devices resizes every other frame in the row to match the one you clicked.
The models marked (3D) — iPhone 17 and iPhone 17 Pro Max — are rendered from real geometry, so their Appearance popover adds pitch and yaw, a matte or glossy finish, and lighting. They're in beta.
Full reference: Devices & frames
06 Add your headline
One short line per screenshot, plus whatever shapes it needs.
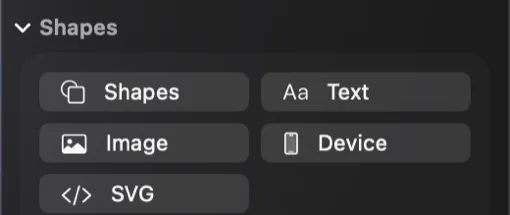
The inspector's Shapes section is where everything on the canvas comes from: a Shapes popover holding Rectangle, Circle and Star, then buttons for Text, Image, Device and SVG. New shapes land in the middle of the current screenshot, already selected.
Writing text
- Double-click a text shape to edit it in place. Esc, or a click outside, commits the edit.
- The properties bar carries font, weight, size, colour, horizontal and vertical alignment, line height and letter spacing.
- Select part of a line while editing and the format bar gives that run its own bold, italic, underline, strikethrough, size or colour. Clear formatting puts it back to the shape's base style.
- Text background turns a headline into a badge — Solid, Pill, Outline or Highlight, with colour, padding, corner radius and opacity.
- Right-click ▸ Copy Text Style, then Paste Text Style on another headline, carries the whole look across.
Repeating something across the row
- Right-click a shape ▸ Duplicate ▸ To All Screenshots drops a copy into every other column at the same relative spot. That's the quick way to put a logo or a footer on all of them.
- SVG is worth using for logos and icons — it stays crisp at any export resolution, and it takes a colour override.
Headlines are read at thumbnail size in the store carousel, so five or six words is usually the ceiling. Screenshots that convert goes into what to actually say.
Full reference: Shapes & text
07 Style the background
Colour, gradient or image — for a whole row, or for one screenshot.
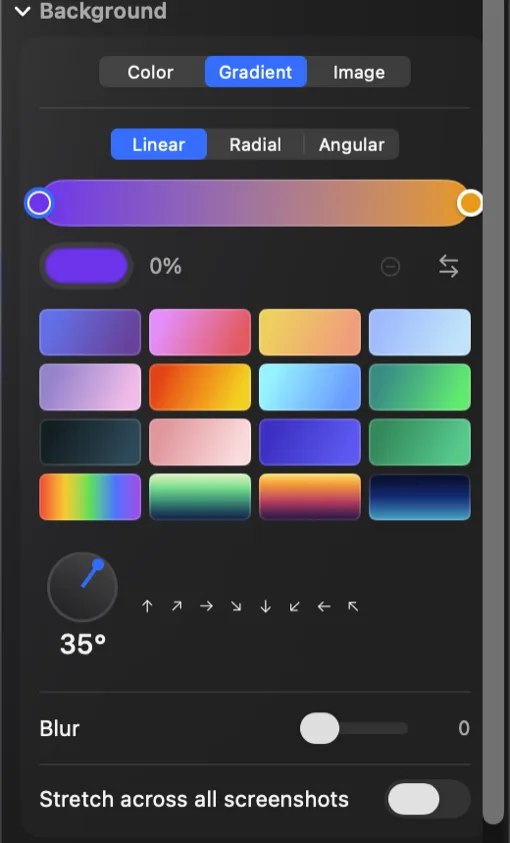
Select a row — click empty canvas space inside it — and the inspector's Background section offers three styles: Color, Gradient and Image.
Gradients
- Linear, Radial or Angular. Add as many colour stops as you want, and set the direction with the angle wheel.
- There are 16 gradient presets under the stop editor if you'd rather not mix your own.
- Blur softens whatever is behind it — useful when a photographic background is competing with your headline.
One background across several screenshots
- The Stretch across all screenshots toggle renders the background once across the full width of the row, instead of repeating it in every column.
- That is how one gradient or a single panoramic image flows through a three-screenshot carousel as one continuous scene.
- It needs at least two screenshots in the row before it does anything.
Overriding one screenshot
- The control bar under a screenshot sets a background for that column alone, replacing the row's.
Image backgrounds take the same fill modes as image shapes — Fill, Fit, Stretch and Tile — and Tile adds spacing, offset and scale per axis.
Full reference: Backgrounds
08 Arrange, align, and preview
Move things around, line them up, then look at the row with the editing chrome gone.
Moving things
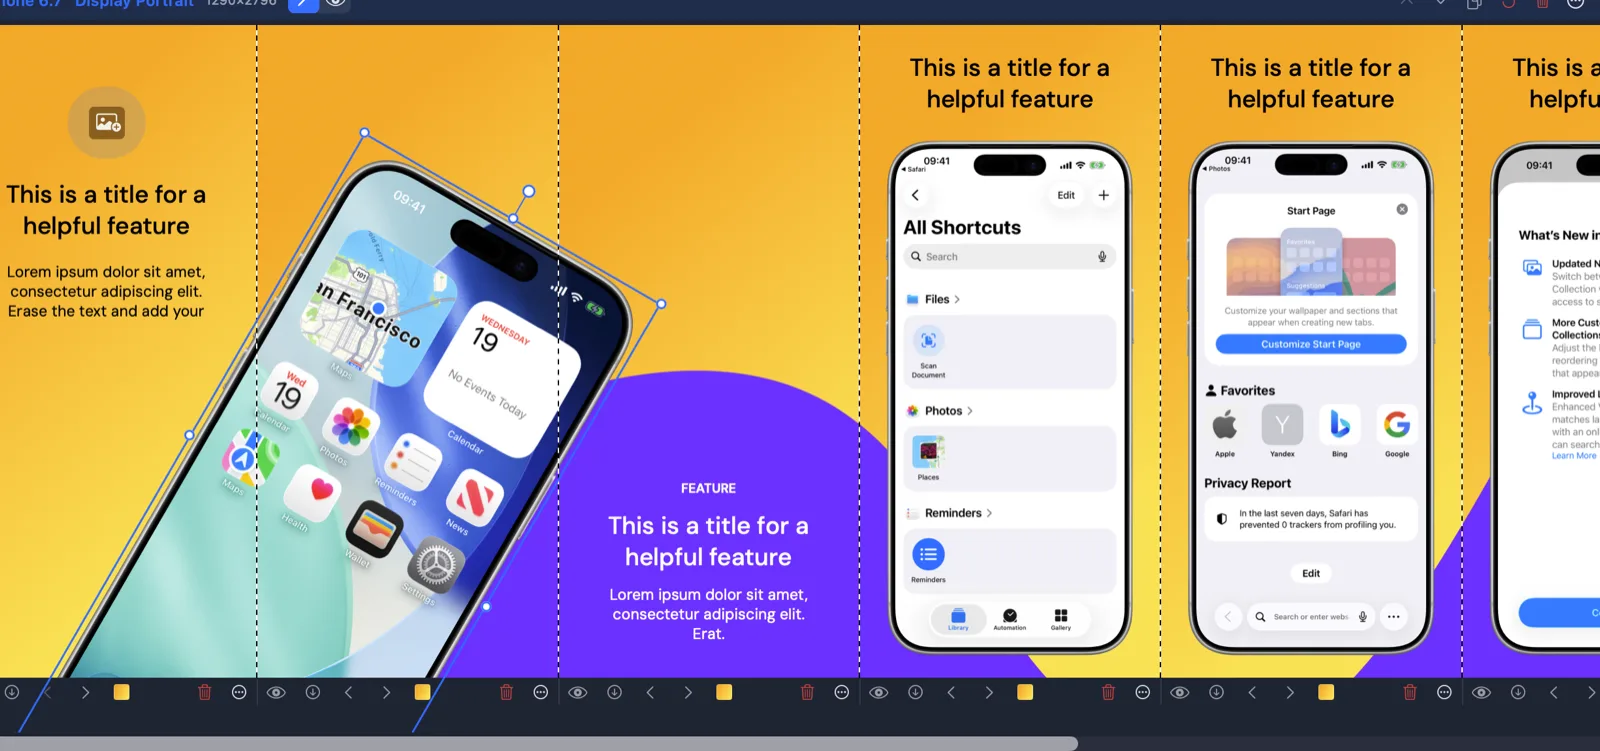
- Drag the body of a shape to move it, a corner or edge handle to resize, and the handle above it to rotate. The rotation field takes a typed number if you want exactly 45°.
- Hold ⇧ while resizing to keep the aspect ratio. Hold ⌥ while dragging to leave a duplicate behind.
- Arrow keys nudge the selection by 1px, ⇧ + arrow by 10px.
Lining things up
- Shapes snap to each other's edges and centres and to screenshot boundaries; blue guides show you what's aligned while you drag.
- Select several, then right-click ▸ Align Selected for the six alignments plus Distribute Horizontally and Distribute Vertically.
- Match to This copies the position, the size, or both, from the shape you right-clicked onto the rest of the selection.
Shapes that cross screenshots
- Shapes sit on the row canvas rather than inside one column, so a headline can begin on one screenshot and finish on the next. On export each column clips to its own bounds.
- If you can only see part of a shape, that's why. Press F to focus the view on the whole thing.
Checking your work
- The pencil / eye switch in a row header flips that row into preview — no handles, no guides, no dividers, exactly what will export.
- Quick Look, in a screenshot's ⋯ menu, renders that single screenshot fully without going near the export flow.
⌘L locks a shape so clicks pass straight through it. Lock your full-bleed background art and you'll stop grabbing it by accident every time you click near the edge.
Full reference: Editing on the canvas
09 Add languages and translate
Design once, then produce the same set in every language you ship.
Adding a language doesn't duplicate your project. Every language shares one set of shapes; what varies is the text — and anything else you choose to override for that language, such as styling, an image, or a position when a translation needs more room.
Adding them
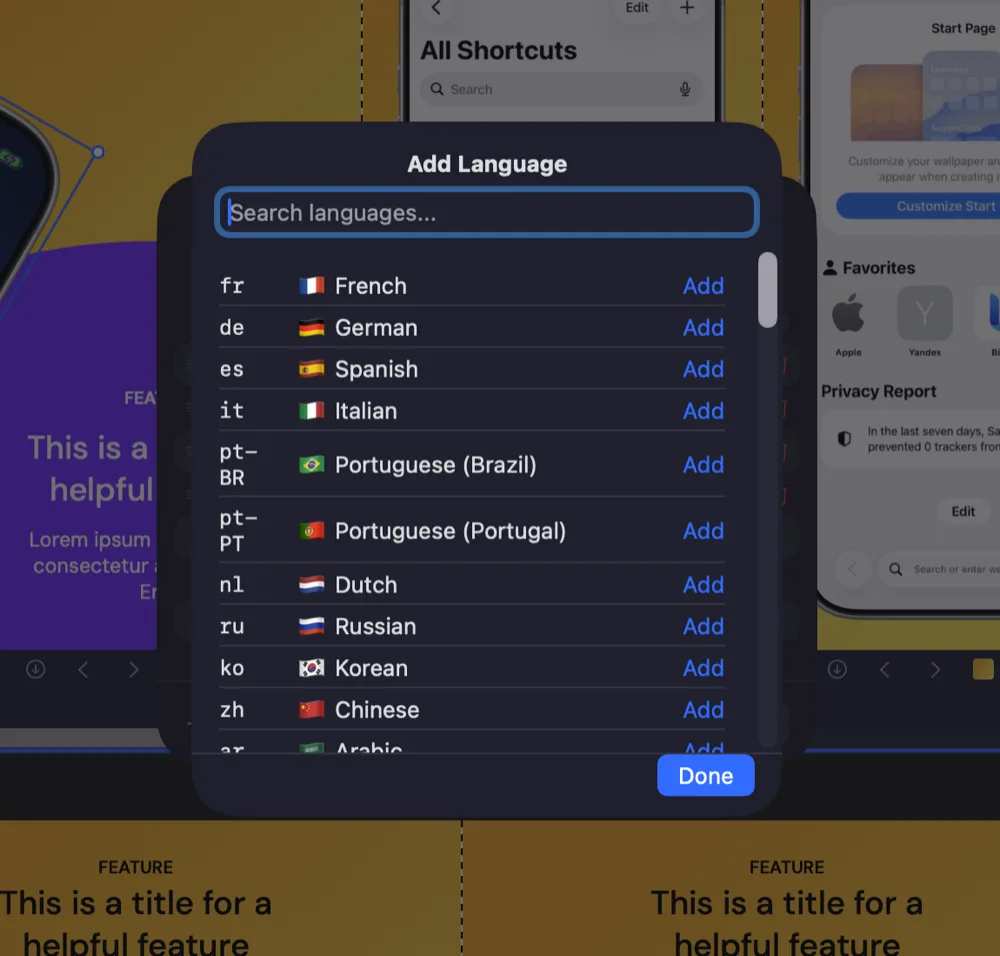
- Language ▸ Manage Languages…, or the language menu in the toolbar, opens the Add Language sheet. Search it, hit Add, then Done.
- There are 81 built-in language presets, and you can define a custom code if the one you need isn't among them.
- The first language you add is the base language — the source text everything else translates from. It carries a Base badge in the list, and you can hand that role to another language later.
Translating
- Auto-Translate Missing Text fills in whatever hasn't been translated yet for the language you're in. It runs on your Mac using Apple's Translation framework, so it covers the language pairs that framework supports; the rest you type or paste.
- Re-Translate All Text… replaces every existing translation — that's the one to run after you reword the base language.
- Edit Translation Table… opens a side-by-side view of every string with all its translations, which is the fastest way to review a language in one pass.
- Right-click a text shape ▸ Reuse Translation links it to another string, so a headline repeated across screenshots only gets translated once.
Working inside a language
- ⌘] and ⌘[ move through your languages; ⌘⌥0 jumps back to base.
- A banner across the top of the canvas tells you when you are not in the base language, so you don't edit the wrong one by accident.
Anything a language has no override for falls back to the base language, so an untranslated headline shows the base text rather than an empty box. Nothing breaks if you only get halfway.
Full reference: Languages & translations
10 Export — and upload to the stores
Render the whole set at store resolutions, then send it to App Store Connect or Google Play.
Exporting to a folder
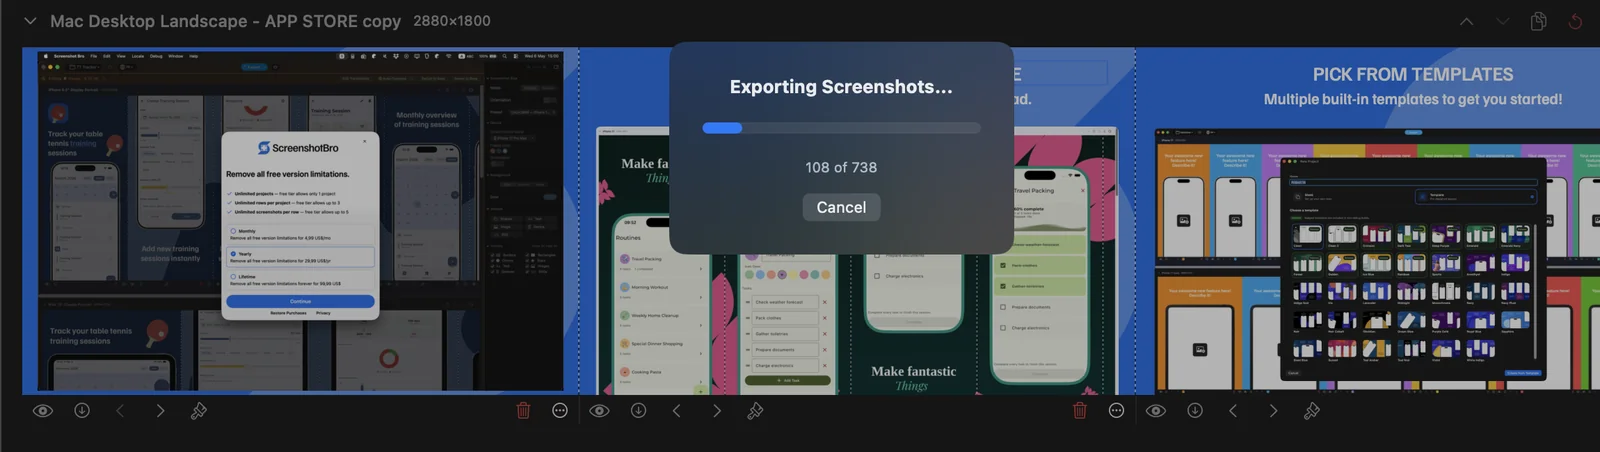
- Export in the toolbar, or ⌘E, renders the project into your export folder. If you haven't set one, it asks for it.
- Export All Screenshots to Folder… picks a destination for a single run; Settings ▸ Export ▸ Export folder sets the one ⌘E reuses from then on.
- Filenames are zero-padded —
01_,02_— so they sort correctly when you upload them. Format is PNG or JPEG in Settings ▸ Export; PNG for store screenshots. - Images come out at the row's exact pixel size — there is no scale factor to choose.
What you get
- One row, one language: a flat folder of images.
- Several languages: a folder per language — the shape App Store Connect's localized uploads expect.
- Several rows: a sub-folder per row label inside each language folder.
- Anything switched off in the inspector's Visibility section is left out of the exported image too, not just hidden in the editor. Template borders and alignment guides are editor-only and never export.
Uploading without leaving the app
- Upload to App Store Connect… in the export menu renders straight from the project. Pick the app and a version, map rows to display types and languages, and Review Changes lists exactly what will be added, replaced or left alone before anything is sent to Apple.
- Upload to Google Play… does the same against a store listing — enter your package name, review the mapping, confirm. The upload is staged as a Play edit and committed when you confirm.
- Each needs credentials set up once: an App Store Connect API key (Issuer ID, Key ID and the
.p8file) or a Google Play service account JSON. Both are stored in your Mac's Keychain. - Both uploads work on the free tier — Pro only lifts the project, row and screenshot limits.
One more export mode
- Row menu ▸ Export Row ▸ Showcase arranges a whole row on a styled background as a single marketing image, in social, square, portrait, story, YouTube or Pinterest proportions. That one is for posting *about* your screenshots, not for the store.
Not ready to connect a real account? Both integrations have a Demo mode in Settings that walks the entire flow against sample data and sends nothing anywhere.
Full reference: Exporting · App Store Connect · Google Play